solution
Fix Maximum Execution Time Exceeded Error in WordPress
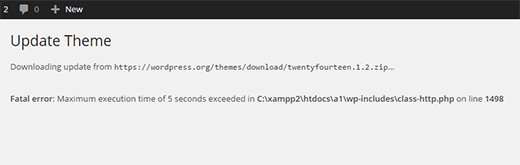
Are you unable to update your WordPress theme due to Fatal Error: Maximum Execution Time Exceeded ? It is simple to fix, but really frustrating for the WordPress beginners. Here we described easy ways to fix Fatal Error in WordPress. Follow these methods and resolve your WordPress Maximum Execution Time Exceeded Error.
How to Resolve Fatal Error: Maximum Execution Time Exceeded in WordPress ?
Everyone wants to improve their WordPress site for getting visitors attention. So, they can install and update new themes and WordPress Plugins to give nice look for their site. If you are not able to update your theme then it will make you feel stress. To overcome this issue, you have to eliminate Fatal Error from your WordPress website.
What is Exceeded Maximum Execution Time Error in WordPress ?
The PHP default maximum execution time is 30 Seconds. If any PHP Script in your WordPress site can take excessive time for execution then maximum execution time error will arise. This Fatal Error: Maximum execution time error is called as Maximum Execution Time Exceeded Error in WordPress. While you updating any theme or plugin for your WordPress site, this fatal error will arise occasionally.
How to Fix WordPress Maximum Execution Time Exceeded Error Easily ?
To overcome this fatal error, you have to expand the Maximum execution time of your WordPress Site. There are 4 possible ways for increasing Maximum execution time of WordPress website. Have a look on those simple and easy methods.
Increase Maximum Execution Time Limit with a Plugin
Expanding Maximum execution time with a Plugin is simple when compared to manually increasing. This is the easiest way to overcome Fatal Error in WordPress.
- First, Login to your WordPress site admin area.
- The WordPress dashboard of your site will appear on the screen.
- The Plugin link is available at the left side navigation bar.
- Click on the Add New option from the Plugin tab.
- Enter “WP Maximum Execution Time Exceeded” in the search plugin field.
- Now, the WP Maximum Execution Time Exceeded plugin is available on the screen.
- Click on the Install Now Button from the WP Maximum Execution Time Exceeded plugin.
- After Installation Completed. Click on the Activate Button from it.
- Now, the WP Exceeded Maximum Execution Time plugin is installed and activated successfully on your WordPress site.
This Plugin can increase the maximum execution time to 300 seconds. By this simple way, you can eliminate the Exceeded Maximum Execution Time error from your WordPress site.
Increase Maximum Execution Time Limit Manually
There are 3 ways to expand execution time limit of your WordPress site manually. Follow those methods and get rid of the Fatal Error: Execution Time Exceeded from your WordPress site.
Edit ‘wp-config.php’ File
- First, You have to access your WordPress site with FTP.
- Download the wp-config.php file from your WordPress website.
- Open the wp-config.php file with text editor.
- Next, Add the given code to the file.
1 | define('WP_MEMORY_LIMIT', '64M'); |
- Now, save and upload the file from Where it is downloaded.
- Now, Check your WordPress site once.
This is one of the easy ways to resolve this “Fatal Error: Execution Time Exceeded” from your WordPress Site.
Edit ‘php.ini’ File
To Edit php.ini file, you have to check your WordPress site has the php.ini file access or not. If you have the access to your WordPress php.ini file then follow the first process. Else, you have to follow the given second process to fix this fatal error.
With php.ini file access
- Access your WordPress website with FTP.
- Search and Download the php.ini file from your WordPress website.
- Open the php.ini file with text editor.
- Now, Add the given code to the file.
1 | max_execution_time = 120; |
- Save the changes.
- Upload the file where it is downloaded from.
- The old php.ini file can be overwritten by the new file.
- Now, Check your WordPress website. The Fatal error is eliminated or not.
Without php.ini file access
- Open your WordPress site root directory with the FTP access.
- Create a new file with the php.ini name.
- Now, Add the given code to the file.
1 | max_execution_time = 120; |
- Next, save the changes.
- Reload your WordPress website.
Edit ‘.htaccess’ File
This is one of the easy methods to resolve Execution Time Exceeded Error in your WordPress Site. Follow these given steps and get rid of the Fetal Error.
- First, you have to Open wp-includes folder of your WordPress with FTP.
- Click on the Server tab from the menu.
- Now, the server tab with various options will display on the screen.
- Select Force Showing Hidden Files option from it. Actually, the FTP Program hides the Dotfiles. The .htaccess is one Dotfile.
- Now, search for the .htaccess file.
- Download the .htaccess file.
- Open the file with text editor and Add the given code to it.
1 | php_value max_execution_time 120; |
- Now, save and upload the file where it is downloaded from.
- The old .htaccess file can be overwritten by the new file.
- Now, check your WordPress site. The Fatal Error is eliminated or not.
By following these above easy and simple methods, you can avoid the Exceeded Maximum Execution Time Error from your WordPress site. We hope this article will helpful you to overcome “Fatal Error: Exceeded Maximum Execution Time” Error from your WordPress site. Keep visiting our site, to get more solutions for your WordPress Theme problems.


You must be logged in to post a comment Login