coding
The basic knowledge needed to code in HTML
Essentials to Code in HTML
Firstly, HTML, which stands for HyperText Markup Language, is not a programming language. As the name says, It’s a markup language. Which means, in HTML, we mark things up for differents parts. HTML is easily readable and understandable. It’s relatively a lot easier than other languages involved in the web development stack. Yet, HTML is the foundation of everything else. You can expect to be able to understand any code in HTML and also produce HTML code after reading this article.
Let’s begin by asking a simple question. What does usually a webpage contains? The answer is information. Web page represents information in many different forms and styles. But eventually, information is at the heart of everything else. And HTML is the language that is used to deliver that information on a web page.
Just like word files, Information on the web is formatted in a structured way to make it easier for readers to read and understand the content. Structuring means segmenting the document in parts like heading, paragraphs, sections and so on. It also means representing texts in different styles like bold, italic, underlined as needed. So, when we say learning HTML, what we really mean is that we are learning how to structure documents for the web.
HTML Tags and Elements
Enough of theory, Let’s get into real things now! Take a look at this little image I’ve taken from BBC News homepage.
What does it consist? It consists of an image, a headline and a paragraph, which altogether represents a news. Now, if we needed it to code in HTML, what we had to write is this:
| <h3> Flamingo balancing act saves energy </h3> <p> Flamingos expend less energy standing on one leg than in a two-legged stance, scientists have confirmed. </p> |
I know what you’re thinking. What the heck are those h3, p and <> things, right? They are called HTML tags. HTML have predefined tags that we use to mark up different parts of a document to give them special meaning or to present them differently. In our example, we’ve marked the sentence ‘Flamingo balancing act saves energy’ with <h3> tags and the sentence ‘Flamingos expend less energy standing on one leg than in a two-legged stance, scientists have confirmed.’ with <p> tags. Here those h3 tags mean that ‘Flamingo balancing act saves energy’ is a heading, and p tags mean that ‘Flamingos expend less energy…’ is a paragraph. Pretty obvious, right?
I can hear you wondering, that; Okay, ‘h’ stands for heading and ‘p’ stands for paragraph. Fine. But why ‘h3’? Well, It’s because HTML supports a series of sizes of headings. It starts from h1 and goes up to h6, Where h1 is the biggest in size and h6 is the smallest in size. If you go to BBC News homepage, you’ll see something like this:
Do you see that big fat headline at the top? You can bet that’s an h1. Notice that relatively smaller heading that says ‘Threat level raised…’? That’s probably an h3. Now you have the idea how headings work. Let’s crush down all about tags.
So, tags usually come in a pairs. Once you open a tag, you must close it (with a few exceptions). And when you close the tag, it means that the content between your opening and closing tag is an element of the type of tags you’ve just used. Don’t be overwhelmed if you don’t understand what I’ve just said. It’s actually easier than it sounds. Let me show you. Take a look at the HTML code carefully.
| <h3> Do you have a map? </h3> <p> Cause I’m <b>lost</b> in your eyes! </p> |
Okay, don’t get lost in romantic thoughts, we aren’t finished learning. Here, we’ve started the h3 tag right before the beginning of the sentence ‘Do you have a map?’ and then we closed it after the question mark. So, that means, this sentence is a heading element. Same way, We’ve started p tag at the beginning of next line and closed it at the end. Hence, the line ‘Cause I’m lost in your eyes!’ is a paragraph element. Also notice, I’ve wrapped the word ‘lost’ with b tags, which stands for bold text. So, the word lost is considered as a bold element. I told you it was easy, see?
So, now you know what HTML tags and HTML elements are. You’ve already learned to code in HTML! For every type of elements, HTML have different tags. The number of total tags of HTML is well over a hundred. But don’t worry, you don’t have to memorize them. You’ll get to know them naturally. For now, Just keep in mind that every HTML tag is wrapped with <> brackets. To open a new tag, you need to write the name of that tag with ‘<>’ around. And to close the tag, just add a ‘/’ (forward slash) right after the first ‘<‘ bracket. Rest is exactly same as an opening tag. Take a look back at the demo code if you find it confusing.
HTML Attribute
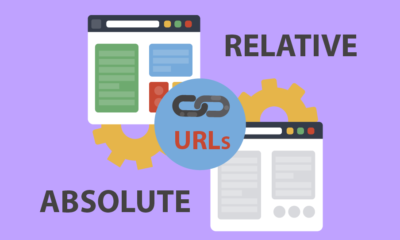
Another very important part of HTML tags is the Attribute. Attribute sits within tags and provides additional information about that tag. For example, we can normally create a paragraph using the <p> tag and that paragraph will be displayed in the default font size of the browser. But if you want to show it in a different font size, you need to deliver that information to the tag. And HTML Attribute is the way to do that.
Any HTML tags can have different attributes. It’s written just before the ending brackets of the opening tags. Attribute follows the form: name=”value”. Let’s see an example:
| <p title=”A made up quotes”> A banana in hand is better than a thousand on the tree! </p> |
Here, the <p> tag have a title attribute that specifies the title of the paragraph. If you hover your mouse over the output paragraph, the title will be displayed as a tooltip. Try it! Cool, right? We’ll explore a lot more attribute in our journey ahead.
Putting it All Together
To give you a more clear understanding, I’m attaching an HTML file with some of the most common elements below. Notice the output on the right and check out the code responsible for them on the left. Feel free to play with it. Try to figure out which tag is causing what effect.
I’ll discuss one very important tags before I end today’s lesson. That is HTML comment tag. A comment is something that you put inside your code and they are not considered as code. Which means, Browsers will ignore comments completely while showing your HTML file. A HTML comments starts with ‘<!–‘ and ends with ‘–>’. Everything you put in between is your comment. Check out the below example:
| <!– I am a HTML comment. No matter how loud I scream, browsers always ignors me like I don’t exists! I always suffer from existensial crysis! 🙁 –> |
Comments are extremely useful for keeping notes/reminders for yourself in the code. You should always comment your code so that you understand why you did something when taking a look at your old code. We’ll discuss comment in details in some future post. For now, check out the comments I’ve made in my code. I’ve described all the tags that I’ve used there so that you can understand their purpose.
See the Pen bzPYdK by Szabi Kisded (@szabi-kisded) on CodePen.
Writing your Own Code in HTML
Feeling excited and wanna write your own code? Jump on that right away! All you need to write your own code in HTML is a text editor. Open up the text editor you already have on your computer (Notepad for Windows and TextEdit on Mac). Write your code using HTML tags you’ve just learned and save the file. The most important part here is to save it as an HTML file. While giving your file a name, just put ‘.html’ at the end as it’s extension.
Once you save, you’ll see your file in your file manager appear as a webpage. Double click on it, And it’ll open in your default browser. Boom! There’s your first webpage you’ve created! Alternatively, if you don’t want to get in the hassle of creating and saving files, you can go straight to Codepen and start writing code in HTML immediately.
Once you learn a little more, you’ll be using an advanced text editor or and IDE for coding. We’ll help you to find a perfect one for you. But for now, simple text editor or CodePen is just fine.
Conclusion
That’s it for today. In the next post, we’ll learn about HTML page structure, How a real webpage is organized inside an HTML file. You’ll also code HTML on your own. Feel free to ask me anything about this post in the comments. Also, I’d be very grateful if you could give me suggestions on how can I make these tutorials better for you. Sharing this post on your social network will be a huge help for us.
So, Have fun while you learn. See ya!


You must be logged in to post a comment Login