Check Plugin Documentation
Get started quickly with our comprehensive guides
About this plugin
This plugin will allow you to build from scratch an autoblogging system, based on your free Plurk account.
This plugin will allow you to automatically post to your Plurk timeline, each time you publish a new post on your blog. Also, existing pages/posts will be able to be posted automatically to Plurk, manually, from post editor page.
Plugin features:
- Post to Plurk timeline any post or page, with the push of a button, or automatically, at post publish
- Using Plurk API – no Plurk scraping/crawling/cookies needed
- The plugin offers many configuration options, like the ability to post to the top of your Plurk timeline, to post instantly, or to delay posting by an amount of seconds
- Detailed plugin activity logging
This plugin requires a Plurk API credentials. How do I get one?
Insert your Plurk Client ID. Learn how to get one here.
WordPress installation
YouTube video tutorial:
I also provided a Quick Install Guide to feature an easy plugin installation for everyone.
To make this plugin work, first, you’ll need to install the plugin. The easiest method is to take the .zip file you’ve downloaded and upload it via Plugins > Add New > Upload Plugin in the WordPress Dashboard. Once the plugin is installed, be sure to Activate it.
Now that you’ve installed and activated the plugin, you’ll see a new menu item created inside WordPress called ‘Plurkomatic Post Generator’. First thing first, let’s head over to Settings > Plurkomatic Post Generator and take a look at what options are available.
Plugin Settings
Refreshingly, Plurkomatic – Plurk Auto Poster has a super-simple settings screen. Let’s look at first at the settings panel:
Here you can find the steps needed in configuring your plugin even if you have no HTML knowledge at all. You can find options for:
HINT! Don’t forget to click the Save button every time you modified your settings, otherwise the modifications will be lost!
Main Settings:
- Plurkomatic Automatic Post Generator Plugin – Main Switch: Enable or disable the Plurkomatic – Plurk Auto Poster. This acts like a main switch.
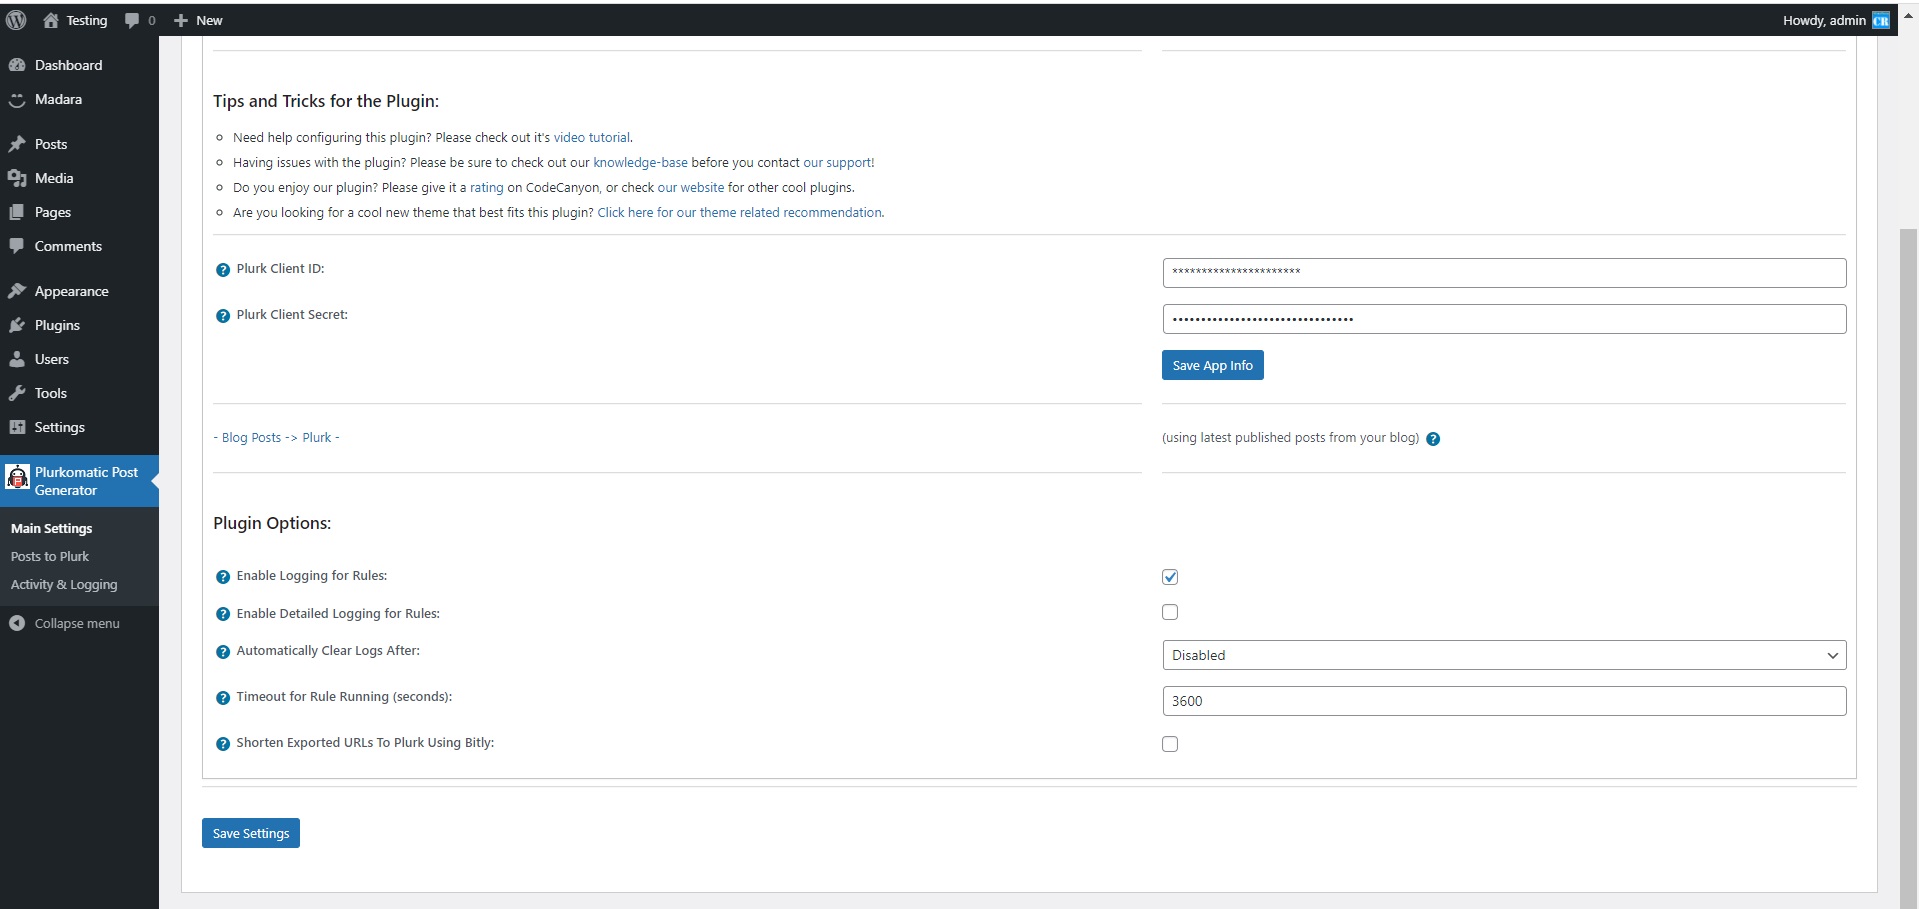
- Plurk Client ID: Insert your Plurk Client ID. Get one here: here.
- Plurk Client Secret: Insert your Plurk Client Secret. After you create your app here: here, you will receive an email with the details of the app. You will find the client secret in the email. Copy it here.
- Enable Logging for Rules: Do you want to enable logging for rules?
- Enable Detailed Logging for Rules: Do you want to enable detailed logging for rules? Note that this will dramatically increase the size of the log this plugin generates.
- Automatically Clear Logs After: Choose if you want to automatically clear logs after a period of time.
- Timeout for Rule Running (seconds): Set the timeout (in seconds) for every rule running. I recommend that you leave this field at it’s default value (3600).
- Shorten Exported URLs To Plurk Using Bitly: Choose if you want to cloak URLs with Bitly link shortener. To lean more about this, please visit this link.
Posts to Plurk Screen:
- Delay Posting By (Seconds): Do you want delay posting with this amount of seconds from post publish? This will create a single cron job for each post (cron is a requirement for this to function). If you leave this field blank, posts will be automatically published on post creation.
- Use Async Posting Method: This option will allow you to select if you want to run posting in async mode. This means that each time you publish a post, the plugin will try to execute it’s task in the background – it will no longer block new post posting, while it finishes it’s job.
- Maximum Post Count Per Time Interval: Set the maximum number of posts to be submitted each predefined time interval (default is 1 hour, you can change this in the ‘Maximum Post Count Interval’ settings from below. To disable this feature, leave this field blank.
- Maximum Post Count Interval (Minutes): Set the maximum number of posts to be submitted each predefined time interval.
- Plurk Post Type: Choose the type of posts to send to Plurk.
- Plurk Post Description Template: Choose the template of your Plurk posts. You can use the following shortcodes: %%variable_content%%, %%featured_image%%, %%post_cats%%, %%post_tags%%, %%blog_title%%, %%author_name%%, %%post_link%%, %%random_sentence%%, %%random_sentence2%%, %%post_title%%, %%post_content%%, %post_excerpt%%
- Auto Cut Content Do you want to auto cut posts to maximum character count allowed by Plurk (360 characters)? Please note that if you disable this settings and the submitted content is longer than 360 characters, you post will not be shared. Note that the image links are also counted.
- Post Qualifier Set the post qualifier which is set for the content. The qualifier comes before the post content.
- Disable Autoposting of ‘Posts’: Do you want to disable automatically posting of WordPress ‘posts’ to Plurk?
- Disable Autoposting of ‘Pages’: Do you want to disable automatically posting of WordPress ‘pages’ to Plurk?
- Disable Autoposting of ‘Custom Post Types’: Do you want to disable automatically posting of WordPress ‘pages’ to Plurk?
- Disable Autoposting of Selected Categories: Do you want to disable automatically posting of WordPress ‘posts’ to Plurk?
- Disable Autoposting of Selected Tags: Input the tags for which you want to disable posting. You can enter more tags, separated by comma. Ex: cars, vehicles, red, luxury. To disable this feature, leave this field blank.
- %%variable_content%% Shortcode Content: Set the %%variable_content%% shortcode content.
- %%variable_content%% Shortcode Occurance Rate: Set the occurance rate of the %%variable_content%% shortcode. In this percentage, the shortcode will be filled with content and posted.
Activity and Logging Screen:
- Restore Plugin Default Settings: Hit this button and the plugin settings will be restored to their default values. Warning! All settings will be lost!
- Activity Log: This is the main log of your plugin. Here will be listed every single instance of the rules you run or are automatically run by schedule jobs (if you enable logging, in the plugin configuration).
How to customize resulting posts with built in shortcodes?
You can use the following shortcodes in post title and content editing:
-
%%post_title%%, %%post_content%%, %post_excerpt%%
- %%variable_content%% – create variable content
- %%featured_image%% – the featured image link of the post
- %%post_cats%% – the categories of the post
- %%post_tags%% – the tags of the post
- %%blog_title%% – the title of the blog
- %%author_name%% – the author name of the post
- %%post_link%% – the link of the post
- %%post_title%% – the title of the post
- %%post_content%% – the content of the post
- %%post_excerpt%% – the excerpt of the post
Summary
Plurkomatic – Plurk Auto Poster is a simple, yet powerful tool you can use to create an autoblog with ease. The setup and settings of the plugin couldn’t have been easier. Now, let’s go and enjoy the results of this great plugin! Have fun using it!
Sources and Credits
This component was made by Szabi CodeRevolution, for more information and support contact us at support@coderevolution.ro
Once again, thank you so much for purchasing this item. As I said at the beginning, I’d be glad to help you if you have any questions regarding this plugin and I’ll do my best to assist.
CodeRevolution