

In this tutorial, we will walk you through the process of setting up the OpenAI API on Microsoft Azure, which provides a robust and scalable environment to deploy and manage your OpenAI API resources effectively.
By following this step-by-step guide, you will learn how to create an Azure account, set up an OpenAI API resource, configure the necessary settings, and obtain the access keys required to access the API. Whether you’re a developer, researcher, or business professional, integrating the OpenAI API into your Azure environment will open up a world of possibilities for natural language processing and generation.
Before getting started, please check Azure’s OpenAI API pricing page.
Step 1: Create an Azure Account – If you don’t already have an Azure account, you’ll need to create one. Go to the Azure portal (portal.azure.com) and sign up for a new account. Follow the instructions provided to set up your account. Also, before getting access to OpenAI API on Azure, you will need to apply for it, by filling out this form. For this, you will need to have a Pay-As-You-Go subscription in Azure Portal. You will need to add the subscription ID in the form you are filling out to get access. If everything is filled out correctly, they usually approve applications without 4-6 hours.
Step 2: Create a New Resource – Once you’re logged into the Azure portal, click on “Create a resource” to begin setting up a new resource.
Step 3: Search for “Azure OpenAI” in the search bar, type “Azure OpenAI” and press Enter. Select the “Azure OpenAI” option from the search results.
Step 4: Configure OpenAI API – In the OpenAI API resource page, click on the “Create” button to start configuring the resource.
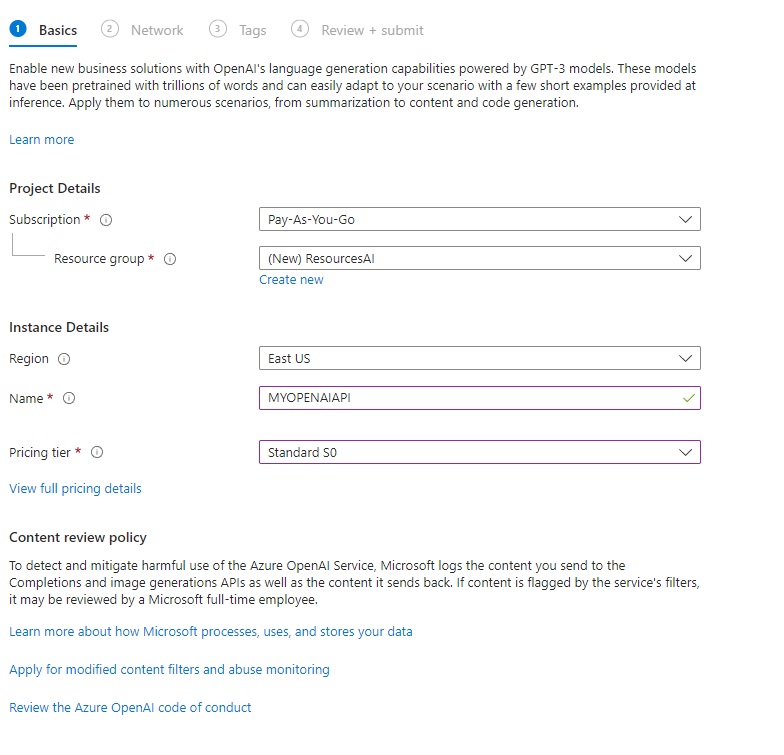
Step 5: Provide Resource Details – In the “Basics” tab, fill out the required information such as the subscription, resource group, and resource name. Choose a region that is closest to your location for better performance. You may also need to select the pricing tier based on your requirements.
Select:
‘Subscription’ -> ‘Pay as you go’
‘Resource Group’ -> Create new -> give it a name
Give the project a name, select basic pricing tier. Click next.

Step 6: Configure Networking – Switch to the “Networking” tab and choose the networking settings for your OpenAI API resource. You can choose to keep the default settings or configure custom networking options based on your needs. (All networks, including the internet, can access this resource.)


Step 7: Click Next – You can skip the tags section, don’t modify anything.
Step 8: Review and Create – After configuring the necessary settings, click on the “Review + Create” button to review your resource configuration. Double-check the details to ensure they are correct. If everything looks good, click on “Create” to create the OpenAI API resource.
Step 9: Wait for Deployment to finish processing. Azure will now start deploying the OpenAI API resource based on your configuration. This process may take a few minutes, so please be patient.
Step 10: Access Keys – Once the deployment is complete, navigate to the resource page for your OpenAI API. In the left-hand menu, under “Settings,” click on “Keys and Endpoint.” Here you will find the access keys that you’ll need to access the OpenAI API.
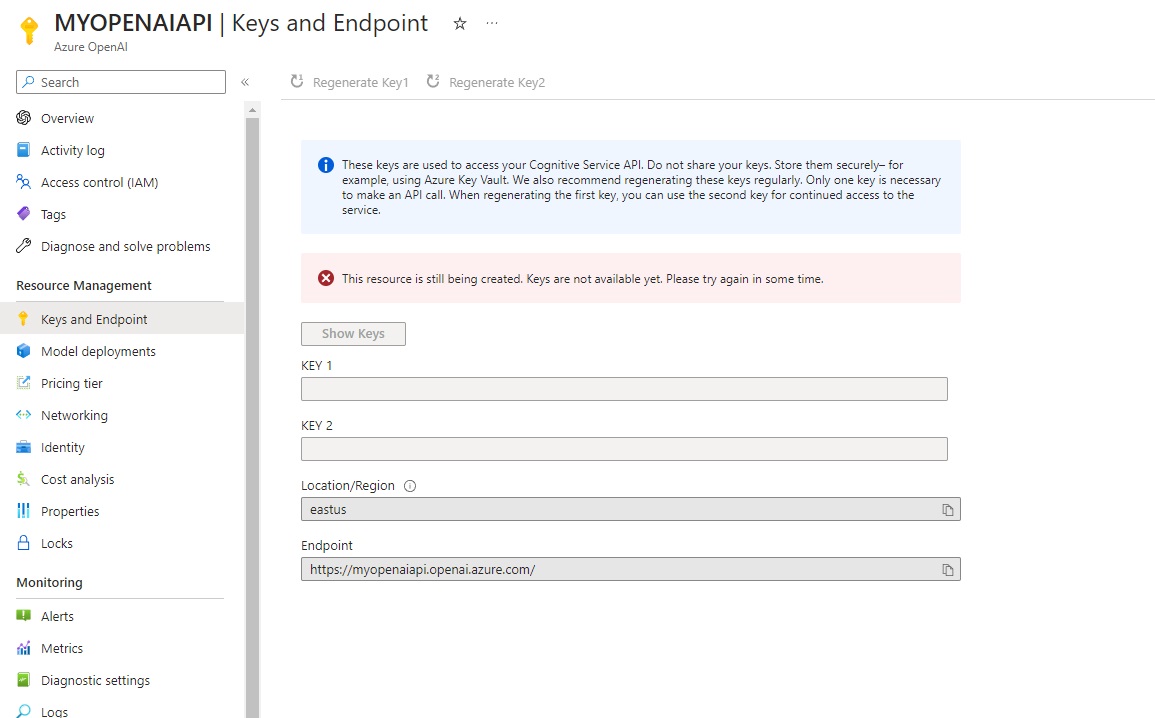

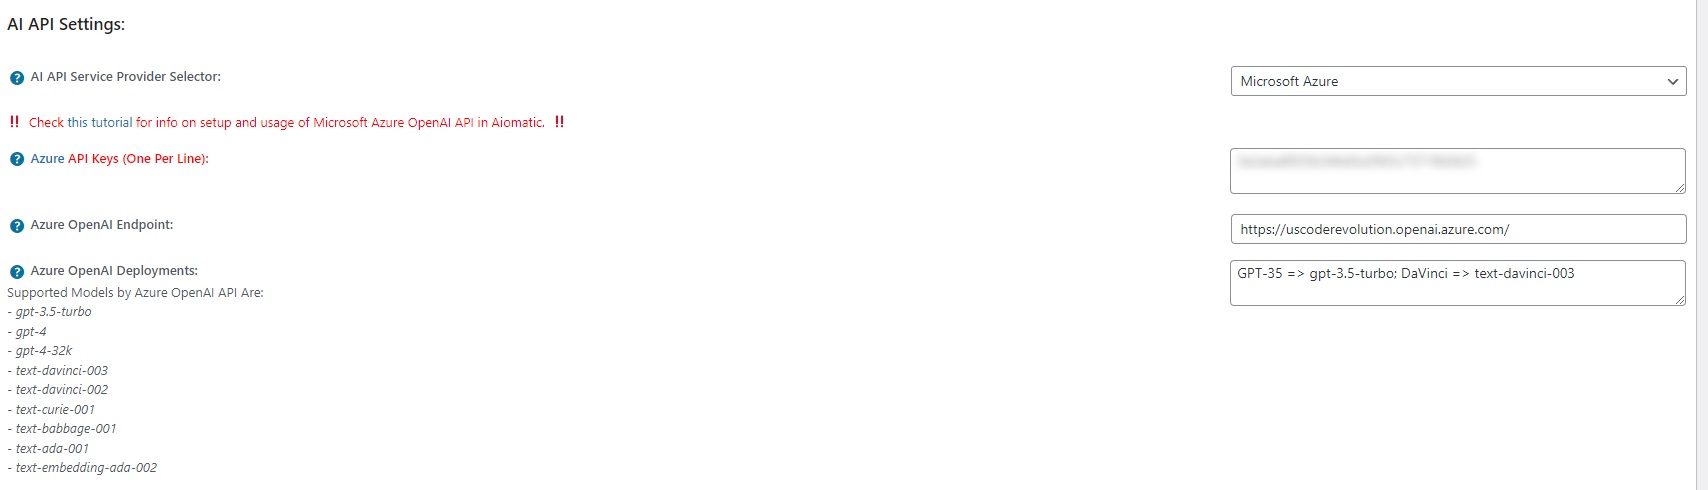
Step 11: Use OpenAI API in Aiomatic – With the access keys in hand, you can now integrate the OpenAI API into Aiomatic. Be sure to add any of the KEYs listed to the plugin’s ‘Azure API Keys (One Per Line):’ settings field, from Aiomatic’s ‘Main Settings’ menu -> ‘API Keys’ settings field. Also, add the URL listed in the Endpoint field, to the ‘Azure OpenAI Endpoint’ settings field of the plugin.
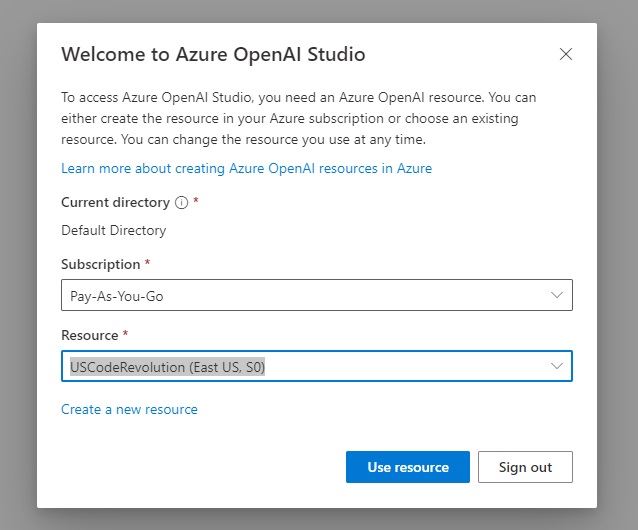
Step 12: Now you need to go to OpenAI Azure Portal. Sign in, and select the Resource you just created and the ‘Pay-As-You-Go’ subscription.

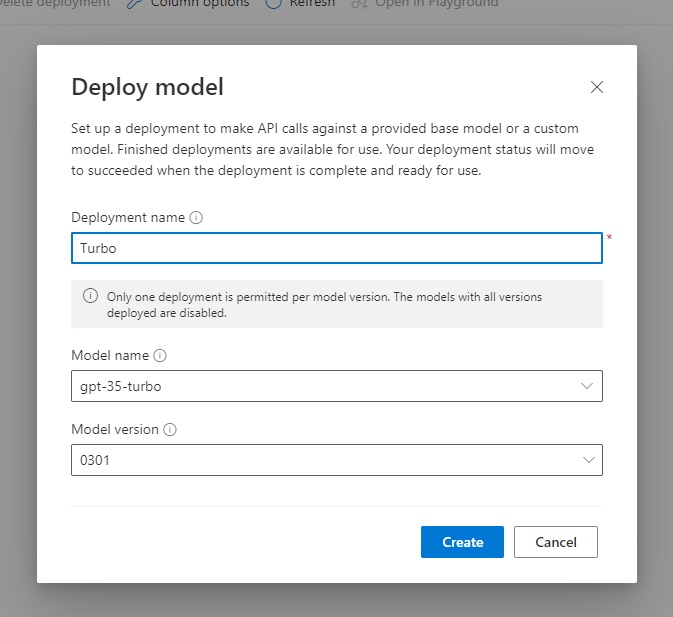
Step 13: Click on the ‘Deployments’ menu on the left. Click ‘Create New Deployment’ (the Plus sign). Give the deployment a simple name and select the model you want to use in the Aiomatic plugin. Please note that you will need to create a separate deployment for all models which you would like to use in Aiomatic!

Step 14: Note: In latest versions of the Aiomatic plugin (v1.4.3 or newer) this step is no longer needed (as the plugin can now automatically list deployments you created in your Azure account), you can skip it. For older plugin versions, the final step is to go to Aiomatic and add in the ‘Azure OpenAI Deployments’ settings field, all the deployments you created at the above step. The for this settings field is: DeploymentName1 => DeploymenetModel1; DeplayName2 => DeploymentModel2. Example: ChatGPT => gpt-35-turbo; DaVinci => text-davinci-003
Settings should look similar to the below image:

Congrats! That’s it! You’ve successfully set up the OpenAI API on Microsoft Azure and integrated it with Aiomatic!
Please note that if you want to get access also to GPT-4 on Azure OpenAI API, you need to ask for access, filling out this form.
You can now start leveraging the power of OpenAI’s language model in your applications or projects. Remember to handle the access keys securely and follow any usage guidelines provided by OpenAI to ensure a smooth and optimized experience.
With the combined power of OpenAI API and AIomatic, you can create advanced chatbots, virtual assistants, content generation systems, content editing systems and much more.
So, go ahead and explore the possibilities of integrating Azure OpenAI API with Aiomatic. Unlock the true potential of AI by building intelligent and dynamic applications that can understand, generate, and respond to human-like text, give it a try!
Happy integrating!
Check also this full tutorial video with step by step guidance from my part:
