“Zapp Proxy Server Plugin for WordPress” Help by CodeRevolution
“Zapp Proxy Server Plugin for WordPress Help”
Created: 16/11/2016
By: CodeRevolution
Email: [email protected]
Thank you for purchasing our plugin. If you have any questions that are beyond the scope of this help file, please feel free to email via our email. Thanks so much!
Table of Contents
About the plugin - top
Zapp Proxy Server Plugin for WordPress is a powerful tool to create a personal proxy server on your WordPress host.
Our intuitive, easy-to-use system allows you to create a a proxy server by just installing the plugin. After installation, you will be able to use your website as a proxy server, out of the box.
What You Can Do With This Plugin?
- Use your WordPress server as a private proxy server
- Create API keys to restrict external access to the plugin's functionality
- Blacklist/ Whitelist URLs that will or will not be able to be accessed using the custom proxy server
- Enable CORS (cross-origin resource sharing)
- Enable caching for accessed resources - a copy of the webpage will be kept on your server, for a predefined period of time, for later use
- You can use external proxies instead of your server's IP
- Change the User Agent that is visible for accessed websites
- Prevent robots from indexing proxied pages
- This plugin also has a responsive design, is fully mobile compatible, is translations ready, is optimized for speed - has no speed impact and benefits of lifetime updates and support.
Getting started using the plugin
You can use these two query parameters, after your website's URL:- zapp_url (to enter the URL which should be accessed)
- zapp_api_key (optional - to provide your api key - if you define the 'API Key List' settings field, below).
Example proxied link:
Precise example: http://testserver.com/wp/?zapp_api_key=YOUR_API_KEY&zapp_url=http://whatismyip.host/
Wordpress installation - top
Youtube video tutorial:
I also provided a Quick Install Guide to feature an easy plugin installation for everyone.
To install this plugin, first, you'll need to install the plugin. The easiest method is to take the .zip file you've downloaded and upload it via Plugins > Add New > Upload Plugin in the WordPress Dashboard. Once the plugin is installed, be sure to Activate it.
Now that you've installed and activated the plugin, you'll see a new menu item created inside WordPress called 'Zapp Proxy Server'. First thing first, let's head over to Settings > Zapp Proxy Server and take a look at what options are available.
Plugin Settings - top
Refreshingly, Zapp Proxy Server plugin has a super-simple settings screen. Let's look at first at the settings panel:
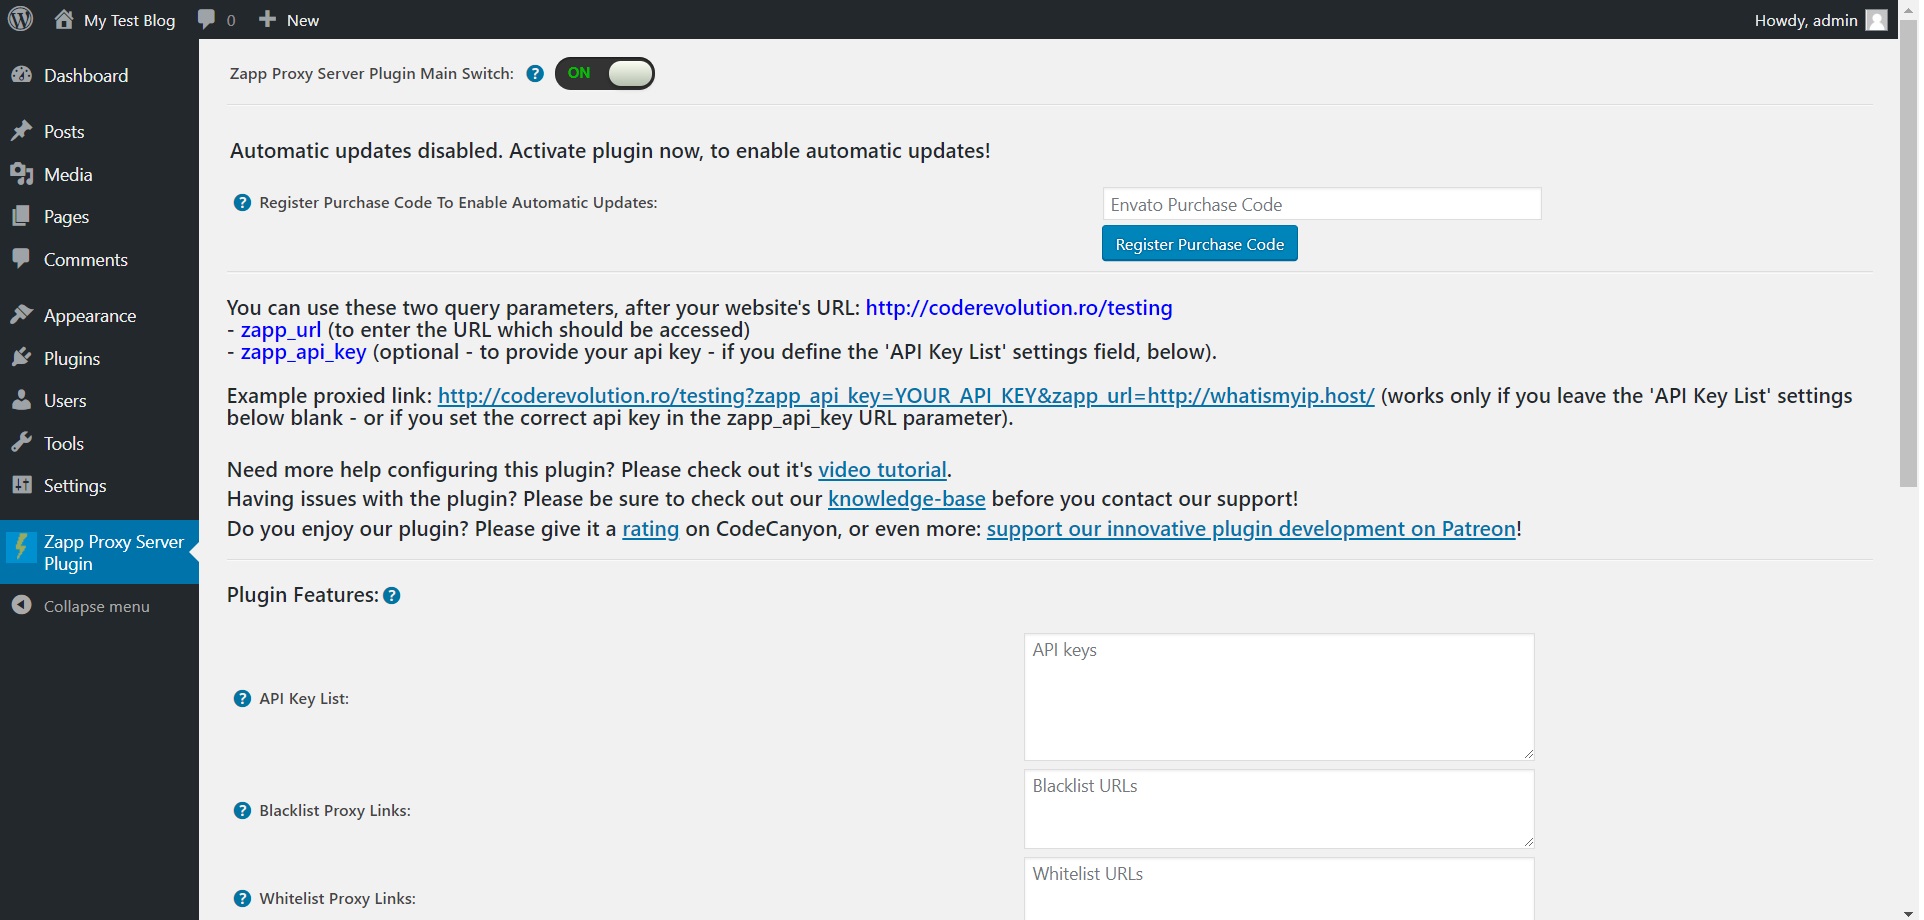
Here you can find the steps needed in configuring your plugin even if you have no HTML knowledge at all. You can find options for:
HINT! Don't forget to click the Save button every time you modified your settings, otherwise the modifications will be lost!
Plugin Features:
- Zapp Proxy Server Plugin Main Switch: Choose if you want to enable or disable the plugin. This acts like the "main switch" of this plugin.
- API Key List: Input a list of API keys (one per line) to use when allowing/denying requests. If you leave this field blank, all requests will be allowed.
- Blacklist Proxy Links: To not allow proxying of specific URLs (blacklist), add corresponding regular expressions to this settings field (separated by new line). Enter the most specific patterns possible, to prevent possible abuse. Example: @^https?://([a-z0-9-]+\.)*facebook.com@i (to match all URLs from facebook.com). To disable this feature, leave this field empty.
- Whitelist Proxy Links: To only allow proxying of specific URLs (whitelist), add corresponding regular expressions to this settings field (separated by new line). Enter the most specific patterns possible, to prevent possible abuse. Example: @^https?://([a-z0-9-]+\.)*facebook.com@i (to match all URLs from facebook.com). To allow proxying any URL, leave this field empty.
- HTML To Show For Blacklisted/Whitelisted Websites: HTML message to show for blacklisted/whitelisted websites. Default value for this is: 'Error: The requested URL was disallowed by the server administrator.'
- Enable CORS: To enable CORS (cross-origin resource sharing) for proxied sites, check this checkbox.
- Enable Requests Caching: Do you want to save requests to local files on your server? Please note that this feature might take a lot of server space to function (for many requests).
- Cache Timeout (seconds): Set the default cache timeout for requests. If you leave this field blank, the default value will be 86400 seconds (1 day).
- Proxy Port: Set the default port for the proxy. Please note that the server must allow connection to that port. The default value for this is 80.
- Show Client IP Address to Proxied Sites: Do you want to report the client machine's IP address to proxied sites via the HTTP `x-forwarded-for` header. This may improve compatibility with some sites, but also exposes more information about end users to proxied sites.
- External Web Proxy Address List: If you want to use a external proxy to crawl webpages, input it's address here. Required format: IP Address/URL:port. You can input a comma separated list of proxies.
- External Web Proxy Authentification: If you want to use a external proxy to crawl webpages, and it requires authentification, input it's authentification details here. Required format: username:password. You can input a comma separated list of users/passwords. If a proxy does not have a user/password, please leave it blank in the list. Example: user1:pass1,user2:pass2,,user4:pass4.
- Default Proxied URL: Start/default URL that that will be proxied when the webpage is loaded in a browser/accessed directly with no URL to proxy in the URL parameters. If empty, the plugin will show its own landing page, configured below.
- Default User Agent for Proxified Requests: Set the default user agent for proxified request. Leave this field blank to inherit the original user agent.
- Prevent Robots From Indexing Proxified Pages: Do you want to prevent robots from indexing proxified pages?
- Local Server Time: The date and time on your server. You should define your timing rules with this knowledge in your mind.
If you are not sure what wildcards are (for regex blacklist/ whitelist pattern match), and how they work, I provided a Guide where I explain the mechanism of wildcards.
Summary - top
Zapp Proxy Server plugin is a simple, yet powerful tool you can use to create a custom proxy server on your WordPress hosting. It can protect you by anonimyzing your traffic. The setup and settings of the plugin couldn't have been easier. Now, let's go and enjoy the results of this great plugin! Have fun using it!
Sources and Credits - top
This component was made by Szabi CodeRevolution, for more information and support contact us at [email protected]
Once again, thank you so much for purchasing this item. As I said at the beginning, I'd be glad to help you if you have any questions regarding this plugin and I'll do my best to assist.
CodeRevolution